Friday 13 December 2013

Dio Brownie


Ah brownies. Bound to be present at any shared lunch or large party, this small baked square of cakey goodness is usually underrated and cast aside when in competition against gooey chocolate chip cookies or perfectly frosted cupcakes.

While the versatility of a brownie can be one of the best things about it, as you have a fudgy, cakey, chewy, or crumbly brownie all by slightly altering the mixture, this makes for a very unreliable baked good.


As a person who definitely prefers a thick fudgy brownie, I really can’t count the number of times I have been disappointed as I bite into a drier, cakey brownie, mumbling “mmmmm”, while strategically planning how to get rid of the rest without anyone seeing.


But there was always one place I could rely on to have the most unforgettable, smooth and rich brownie served everyday.  The Diocesan School Cafeteria. If you are a dio girl you will definitely know what I am talking about, and looking back it’s a wonder that I didn’t end up obese or broke at the amount of tuck shop brownie I ate.


Unfortunately this was no recipe that any old ‘volunteer parent’ could have a glance at while working their once a year shift, no, no, it was a well kept secret between few, which kept a large number of girls queuing up daily. So you can imagine how thrilled I was when my school released their cookbook “Essence of Dio” including the coveted brownie recipe.


So as I said before this is the basic recipe so if you want to change the texture or taste to your personal preference then go ahead!


Dio Brownies

Ingredients
             250 grams butter
             1 1/2 cups cocoa
             2 1/4 cups caster sugar
             1.5 teaspoons vanilla essence
             5 eggs, beaten
             1 cup standard flour
             1 tsp baking powder
             1 block of dark chocolate (approx 250 grams), chopped up
             Icing sugar to sprinkle (optional)

Method

Line a 12 by 10 inch baking tray, and heat your oven to 180C bake.

Melt the butter, and mix with the cocoa in a large bowl. Add the eggs, vanilla, and caster sugar to the bowl and stir well. 


Sieve the flour and baking powder into the mixture. Finally, add the chocolate and mix everything together. Pour into the lined tin, and bake for about 40 minutes until firm to touch on the edges, but still soft in the middle. Now all ovens are slightly different so it helps to check after 25 minutes just in case your oven is a bit hotter/faster.

Now if you are impatient like me this is especially important, for the best results leave the brownie in the tin for 10-15 minutes so you allow time for it to cool down and set a little. I even put mine in the fridge after it had initially cooled down. And simply using a cookie cutter you can make beautiful brownie hearts that make cute little christmas gifts when wrapped in cellophane. 


*Enjoy a generous sized piece with a large glass of milk*


Sunday 17 November 2013

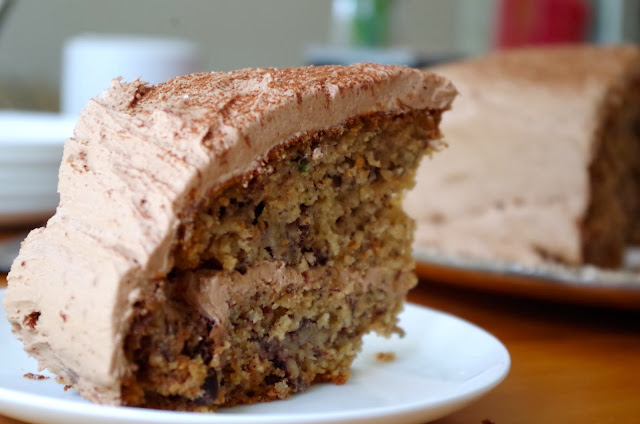
Simply the Best Banana Cake


Memories are funny things, and I always find that my mind is especially focused on them during exam times whether its trying to recall the area of forest cut down each year in the Amazon Basin or it’s the conclusion of my literature essay. I find the brain pretty spectacular in its ability to store so much information but not always the right kind, as the lyrics to my new favorite song isn’t the most helpful thing to remember in a math exam. But for some reason certain memories stay with us, and this recipe is definitely one of them. 

Easy, basic and a little bit ugly isn’t usually something I would look for in a cake, but ever since an old family friend shared the recipe, the ‘Simply the Best banana cake’ became a family favorite which I will always remember.  


The reason I love this beautiful little mess of a cake is two-fold. Firstly it's one of those cakes which is versatile, you can change the recipe depending on what its needed for, add nuts when you’re feeling healthy, or chocolate chips for an afternoon tea, and even coat it in frosting for a birthday/event. Secondly it’s a bit of a slap-dash cake, as it only has 6 ingredients and the method is simple,which sometimes is just what you need at the end of the day.


Simply the Best Banana Cake

INGREDIENTS
2 ½ Cups Self-Raising flour, sifted
1 t baking soda, sifted
1 cup caster sugar
4 eggs
2 ½ cups mashed banana (about 4 bananas)
1 cup sunflower or vegetable oil
* In this one I added 1 cup chopped walnuts

Frosting:
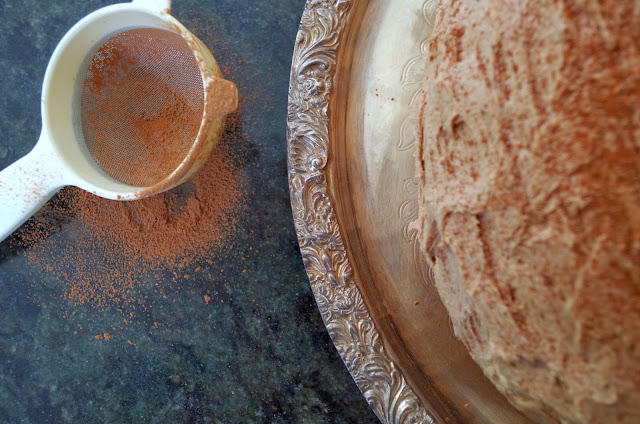
I use the ‘Perfect Chocolate Buttercream’ recipe from Iambaker here. Although I add ½ cup chocolate chips and cream to make a ganache, once that is cool, mix it into the frosting for a more chocolaty taste.

Introduced to me by my friend Georgia,  with or without milk this tea is a personal favorite


METHOD
1. Preheat the oven to 160C then grease and line a 20cm round tin.
2. Sift the flour and baking soda into a bowl. Stir in the sugar, eggs, banana and oil.
3. Mix gently to a smooth batter and add nuts
4. Pour into the cake in and bake for 1½ hours.
5. If you feel like fancying this cake up then slice in half and ice with chocolate frosting.

6. Take a generous slice because it’s Monday and you deserve cake.


Friday 15 November 2013

Chocolate Cupcakes

Some people claim that there is nothing worse than leaving an argument with a significant other unfinished, and the anguish you feel at letting someone have such an influence over your emotions for the day.  So you can imagine my surprise when I realized the relationship I have with my kitchen is no exception to this rule.


I can't count the number of days that have been spent in frustration as I allow the result of a cupcake mixture that has been lovingly measured, sifted and whisked dictate my emotional stability for the day. I can confidently say without a doubt, that the consistency of a batch of Russian fudge can literally make or break my week.

In fact it has reached the point where my family and friends are no longer surprised to come home and occasionally see me lying down on the kitchen floor, covered in a mixture of flour and defeat while a slightly overcooked tray of brownies sits on the counter.

(Slightly un-pretty batch, attempt #1)

So today just happened to be one of those days, I had it all planned out to the minute, but as per usual halfway through the day the study schedule was in the bin and I was in the kitchen with a picture of perfectly frosted cupcakes in my head. 


Although upon realizing that the beautiful chocolate frosting I had made wasn't going to hold shape, I did what logical person in my situation would do. I covered them with a generous heaping of grated toblerone chocolate and called it a day, again proving that chocolate can fix almost any problem.


Now I present to you my go-to chocolate cake recipe from Annabel Langbein, which also makes great cupcakes. It uses 1 bowl and literally takes about 5 minutes to prepare, and while I am not a coffee person it gives the cake a richer, less sweet taste instead of adding more cacao powder.

Chocolate Cupcakes


Ingredients:
       3 cups self-raising flour
       2 cups sugar
       1½ tsp vanilla extract
       ¾ cup cocoa powder
       2 tsp baking soda, sifted
       200g butter, softened
       1 cup milk or unsweetened yoghurt (buttermilk also works)
       3 large eggs
       1 cup boiling hot coffee

Heat oven to 160°C. Grease the sides and line the base of a 30cm round cake tin or 2 x 20cm round cake tins with baking paper.
Place all ingredients in a bowl or food processor and mix or blitz until the ingredients are combined and the butter is fully incorporated. Pour mixture into prepared tin or tins and smooth top. Bake for 1 hour or until a skewer inserted into the centre comes out clean. Allow to cool in the tin. If not using at once, the cake will keep for about a week in a sealed container in the fridge.


To ice, use this fantastic frosting from the "I am baker" blog here!


Wednesday 16 October 2013

Coconut Whispers


Okay okay, so I know that posting 2 cookie recipes in a row is probably a food blogging no-no but I couldn’t help posting this beautiful recipe. Now I collect baking books/ magazines like you wouldn’t believe, and this recipe is a slight adaptation from one of my more worn-down, mixture splattered books.


So this is a slightly adapted version as I felt that an amazingly crispy coconut cookie such as this deserves to be sandwiched between a thick layer of butter frosting.


With only 5 ingredients and 1 bowl they are so delicious and easy to make that I am surprised I have never come across them before! So take the opportunity to impress all of your friends with your very fancy frosted double-decker cookies.


Coconut Whispers

Ingredients:
Butter (softened) 55g
Sugar 115g
Vanilla Essence 1/2 t
Egg 1
Coconut 150g
Self Raising Flour 1 1/2 C

Icing*:
Butter 50g
Icing Sugar 1C
Vanilla Essence 1t

*Now I usually 'wing it' and rely on my bakers intuition when it comes to frosting so these are just generalized measurements. But don't be scared, live a little and abandon your measuring cups and spoons for a moment!

Method:
Pre-heat the oven to 325F/160C and line two baking trays with paper.
Cream together the butter and sugar until light and fluffy, then add the vanilla essence and the egg and beat well.

Stir in the coconut then the flour, mix well to combine
Place teaspoon sized balls onto the tray and leave in the fridge for 10-15 minutes (this helps them keep their shape)

Bake for 25-30 minutes until golden, leave them on the baking tray for approx. 5 minutes before transferring to a cooling rack


Once cool pair biscuits of similar size and place 1t of the frosting in the middle of the biscuits, gently press down until the frosting reaches the edges. Store in an air-tight container in the cupboard, they last for about 2 days.


Saturday 12 October 2013

The Ultimate Rainy-Day Chocolate-Chip Cookies


If you know me then you know that summer is most definitely my favorite part of the year, so you can imagine how cheated I felt when I woke up to gale force winds and thunderstorms outside.


But I waste no excuse to bake and found that in a situation like this there was no option but to stay in my pajamas, bake cookies and watch an entire season of friends.


As chocolate chip cookies were the first thing I ever learnt to bake this post definitely brings back memories of helping my Nana in the kitchen by creaming the butter and sugar as well as exercising my role as the official cookie dough taster. As my love of baking really started during making these with my Nan I believe that a chocolate chip cookie recipe is one that all bakers should have in their handbook. So here I give you the Ultimate Rainy-day Gooey Chocolate Chip Cookies!


As this was 'spur of the moment' cookie making (isn't it always!) so the original recipe and suggested you refrigerate the dough for 24 hours (I love cookies but there is no way I was waiting that long) and used a combination of Cake Flour and Bread flour, which you can view here.


The Ultimate Rainy-Day Gooey Chocolate-Chip Cookies

Ingredients:
3 2/3 cups minus 2 tablespoons Plain Flour
1 1/4 teaspoons baking soda

1 1/2 teaspoons baking powder

1 1/2 teaspoon sea salt

2 1/2 sticks unsalted butter, softened

1 1/4 cups brown sugar

1 cup plus
2 tablespoons granulated sugar

2 large eggs

2 teaspoons vanilla extract

2 2/3 cup chocolate chips + chopped cooking chocola

Directions:
1. Preheat oven to 180C
2. In a large mixing bowl, sift together flours, baking soda, baking powder and salt. Set aside.

3. Using an electric mixer, cream together butter and sugars. Mix for about five minutes to ensure a light and creamy texture. 
4. Add eggs one at a time, mixing well after each addition. Pour in vanilla and mix well.

5. Add flour mixture to butter mixture and stir until combined, avoiding over-mixing. Add chocolate chips. (try not to eat the entire mixture)


6. Roll into a thick rope and refrigerate for at least 15minutes.

7. Slice rounds of dough using a sharp knife and place onto a cookie sheet.
8. Bake for approximately 12 to 15 minutes, or until light golden brown.
9. Remove from oven and let cookies cool on baking sheet for 10 minutes.
10. Transfer to a cooling rack and allow cookies to cool completely.

I took this opportunity to also make ice-cream cookies which are possibly the most amazing way to eat cookies. The logistics are quite difficult so stay with me;
1. Take two cookies
2. Fill with as much ice-cream as possible!


*Proceed to eat the entire batch with ice-cream and never regret it because cookies are amazing and regretting it would hurt their feelings